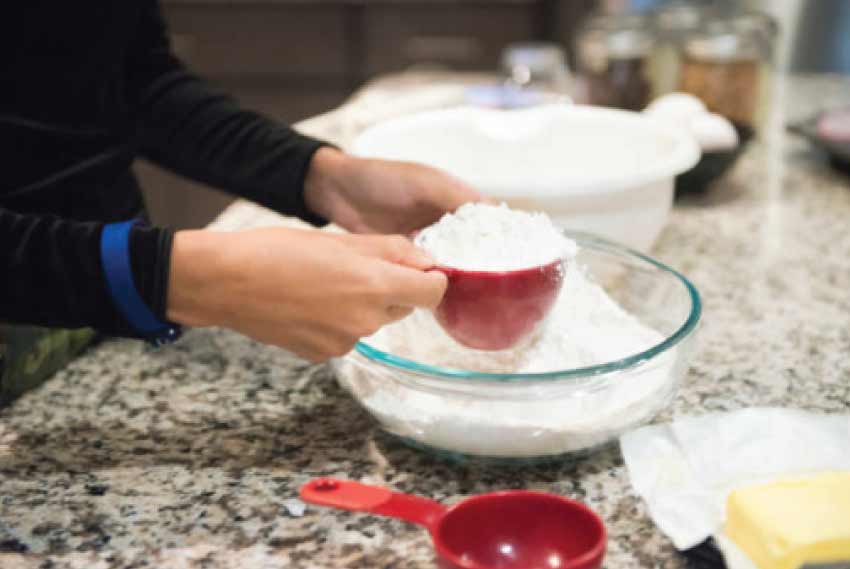
200 gr of flour in cups
From grams to cups can vary depending on the density of the ingredient being measured. Flour is one of those ingredients that can be quite variable due to factors like how it’s packed, the humidity, and the type of flour used. However, as a rough estimate:
200 grams of all-purpose flour is equivalent to about 1 and 2/3 cups.
200 grams of whole wheat flour is roughly 1 and 2/3 cups.
Remember that these are approximate conversions, and for baking or cooking requiring precise measurements, it’s recommended to use a kitchen scale for accuracy.
Here are some more specific conversions for different types of flour:
200 grams of cake flour is approximately 1 and 5/8 cups.
200 grams of bread flour is roughly 1 and 1/2 cups.
200 grams of self-rising flour is approximately 1 and 2/3 cups.
Remember that these conversions are still approximate due to the variability in how flour can be packed and the differences in flour types. If you’re looking for precise measurements, using a kitchen scale or referring to a reliable baking measurement chart is best.
Here are additional conversions for different types of flour:
200 grams of whole wheat flour: about 1 and 1/3 cups
200 grams of almond flour: roughly 2 cups
200 grams of coconut flour: approximately 2 and 2/3 cups
200 grams of oat flour: about 1 and 3/4 cups
200 grams of cornstarch: roughly 1 and 1/2 cups
Again, please note that these conversions are approximate and can vary based on factors like how the flour is packed and its moisture content. For accurate measurements, a kitchen scale is the best tool to use.
Introduction to converting grams to cups
Converting grams to cups is a common task in cooking and baking, especially when dealing with ingredients that have different densities. Grams are a unit of mass or weight, while cups are a unit of volume. Converting between these two units requires consideration of the density of the ingredient being measured. Here’s an introduction to the process of converting grams to cups:
Understand Ingredient Density: Different ingredients have different densities, meaning that one ingredient’s weight might take up more or less space than the same weight of another. This is why the conversion from grams to cups can vary based on the ingredient.
Use a Conversion Chart: Many cooking resources provide conversion charts that offer approximate conversions for various ingredients. These charts are helpful starting points but need more accuracy due to packing and humidity variations.
Use a Kitchen Scale: A kitchen scale is your best friend for precise measurements. It allows you to measure ingredients by weight directly in grams, eliminating the need for conversions. This is especially important in baking, where precise ratios are crucial.
Be Mindful of Type and Sifted Flour: Flour can be tricky to convert due to its varying densities. For example, sifted Flour is usually lighter and fluffier than unsifted Flour. Pay attention to whether the recipe specifies the type of Flour and its preparation (sifted or not) for more accurate conversions.
Adjust Based on Experience: With more experience in cooking and baking, you’ll better understand how different ingredients convert from grams to cups over time. You might prefer using grams for accuracy, especially in baking.
Taste and Texture Considerations: In some recipes, slight variations in the quantity of an ingredient might make a small difference in the outcome. Precise measurements can be crucial to achieving the desired taste and texture, particularly in baking.
Remember that when precision matters, such as in baking, grams or a kitchen scale are preferred. For more casual cooking, you can use approximate conversions as a starting point, but always be prepared to adjust based on your experience and the final result you’re aiming for.
Understanding the conversion ratio for Flour
When converting from grams to cups, Flour’s conversion ratio depends on several factors, including the type of Flour, how it’s packed, and the measurement technique used. Due to the varying densities of different types of Flour and the way it can be packed, the conversion ratio isn’t a fixed value. Here’s a general guideline to help you understand the conversion ratio for Flour:
Type of Flour: Different types of Flour have different densities. For example, all-purpose Flour and whole wheat flour have different densities due to protein content and processing variations. Like whole wheat flour, heavier Flour generally has a lower conversion ratio (grams to cups) than lighter flour, like cake flour.
Packing Density: How you pack Flour into a measuring cup can significantly affect the conversion ratio. Flour can be aerated or compacted, which leads to variations in the amount of Flour in the cup. Sifting Flour before measuring can also impact the ratio.
Measurement Technique: People may use slightly different techniques for measuring Flour, leading to variations. Some recipes might specify a “scoop and level” method (where you scoop the Flour into the cup and then level off the excess), while others might specify a “spoon and sweep” method (where you spoon the Flour into the cup and then sweep off the excess).
Humidity and Environment: The humidity in your environment can affect the moisture content of the Flour, which can influence its density and, consequently, the conversion ratio.
Due to these variables, providing a precise conversion ratio for all types of Flour is challenging. However, as a rough starting point:
All-purpose Flour: Around 125-130 grams per cup (scoop and level method)
Whole wheat flour: Around 120-125 grams per cup (scoop and level method)
Cake flour: Around 100-110 grams per cup (scoop and level method)
Remember that these values are approximations and might not be accurate for all situations. If precision is crucial for your recipe, using a kitchen scale to measure ingredients in grams is best. This approach ensures the most accurate results and helps maintain the consistency of your dishes, especially in baking, where precise ratios matter.
How to measure Flour accurately
Measuring Flour accurately is essential, especially in baking, to achieve consistent and reliable results. Here are some tips on how to measure Flour accurately:
Use a Kitchen Scale: The most accurate way to measure Flour is by using a kitchen scale. Weighing ingredients in grams provides consistent and precise measurements. This method eliminates discrepancies caused by density, packing, and humidity differences.
Fluff the Flour: If you don’t have a kitchen scale, fluff it in its container using a spoon or a whisk. This helps break up clumps and aerates the Flour, making it less compact.
Spoon and Level Method: Use the spoon and level method to avoid packing the Flour down for measuring with cups. Here’s how:
Gently spoon Flour into the measuring cup without compacting it.
Use a flat edge, like the back of a knife, to level off the excess Flour from the top of the measuring cup. Do not tap the cup or shake it to level the Flour.
Sift (Optional): Sifting Flour can help break up clumps and aerate them, resulting in a more accurate measurement. If your recipe calls for sifted Flour, sift it before measuring.
Don’t Scoop: Avoid scooping the measuring cup directly into the flour container. Scooping can compact the Flour and lead to inaccurate measurements.
Check Recipe Instructions: Some recipes might specify a Flour measuring technique, so always follow the instructions. Different recipes call for different measurement methods to ensure consistent results.
Consider Humidity: Flour can absorb moisture from the air, impacting its density. If your kitchen is humid, Flour might become more compact over time. Measuring Flour as close to when you need it is a good idea.
Use the Right Measuring Tools: Use dry measuring cups specifically designed for dry ingredients like Flour. Liquid measuring cups have a spout and are designed for liquids, so they might not provide accurate measurements for Flour.
Practice and Consistency: As you gain experience over time, you’ll develop a better feel for accurately measuring Flour. Consistency in your measuring technique will lead to more reliable results.
Remember that baking is a science, and accurate measurements play a crucial role in the success of your baked goods. While measuring by weight using a kitchen scale is the most precise method, proper measuring techniques with cups can yield good results if done carefully and consistently.
Converting 200 grams of Flour to cups
Converting grams to cups can be tricky, as the conversion depends on factors like the type of Flour and how it’s packed. However, as a rough guideline:
For all-purpose Flour: Approximately 1 and 2/3 cups
For whole wheat flour: Approximately 1 and 1/3 cups
For cake flour: Approximately 2 cups
Please remember that these are approximate conversions and can vary based on factors like the Flour’s density, how it’s packed, and even humidity. For precise measurements, it’s always best to use a kitchen scale.
Tips for measuring Flour consistently
Measuring Flour consistently is crucial, especially in baking, to ensure accurate and reliable results. Here are some tips to help you measure Flour consistently:
Fluff the Flour: Before measuring, fluff the Flour by gently stirring it with a spoon or whisk. This helps break up clumps and aerates the Flour, making it less compact and ensuring more accurate measurements.
Spoon and Level Method: Use the spoon and level method to measure Flour with cups. Here’s how:
Gently spoon Flour into the measuring cup without compacting it.
Use a flat edge, like the back of a knife, to level off the excess Flour from the top of the measuring cup. Do not tap the cup or shake it to level the Flour.
Avoid Scooping: Do not scoop the measuring cup directly into the flour container, as this can compact the Flour. Instead, spoon the Flour into the cup.
Use the Right Measuring Tools: Use dry measuring cups specifically designed for dry ingredients like Flour. Liquid measuring cups have a spout and are designed for liquids, so they might not provide accurate measurements for Flour.
Check Recipe Instructions: Some recipes might specify a particular flour measuring technique, so always follow the instructions. Different recipes call for different measurement methods to ensure consistent results.
Consider Humidity: Flour can absorb moisture from the air, impacting its density. If your kitchen is humid, Flour might become more compact over time. Measure Flour as close to when you need it as possible.
Practice and Consistency: With practice, you’ll develop a better feel for accurately measuring Flour. Consistency in your measuring technique will lead to more reliable results over time.
Use a Kitchen Scale: For the most accurate measurements, use a scale to weigh the Flour in grams. This eliminates the variability caused by packing and density differences.
Record Your Method: If you find a specific measuring technique that consistently works for you, note it. This can help you achieve consistent results in the future.
Measure by Weight for Precision: Whenever precision is crucial, such as baking, use a kitchen scale to measure Flour by weight. This approach ensures accuracy and is especially important when following recipes that provide measurements in grams.
Remember, consistent measuring leads to more predictable outcomes in your cooking and baking. Over time, you’ll develop a sense of measuring Flour accurately for your specific recipes and preferences.
Common mistakes to avoid when measuring Flour
When measuring flour, several common mistakes can lead to inaccurate measurements and potentially affect the outcome of your recipes, especially in baking. Here are some mistakes to avoid:
Scooping the Flour Directly: Avoid scooping the measuring cup directly into the flour container. This can compact the Flour and lead to an excessive amount in the cup. Instead, use the spoon and level method to measure.
Not Fluffing the Flour: Failing to fluff before measuring can lead to a packed cup. Always fluff the Flour with a spoon or whisk to break up clumps and aerate it before measuring.
Tapping or Shaking the Cup: After scooping the Flour, tapping or shaking the measuring cup to level can result in an uneven measurement. Use a flat edge to level off the excess flour gently.
Using Liquid Measuring Cups: Liquid measuring cups have a spout and are designed for liquids. Using them to measure Flour can lead to inaccurate measurements due to differences in volume.
Not Sifting When Required: Some recipes call for sifted Flour. If the recipe specifies sifted Flour, sift it before measuring. Sifting helps ensure an accurate measurement and incorporates air into the Flour.
Ignoring Humidity: Flour can absorb moisture from the air, causing it to become compact. The Flour’s density can change if your kitchen is humid, leading to inaccurate measurements.
Guessing or Eyeballing: Always measure ingredients precisely, especially in baking. Guessing or eyeballing quantities can throw off the balance of the recipe.
Using Old or Compacted Flour: If your Flour has been sitting in the container for a while, it might become compacted. Always fluff it and, if necessary, sift it before measuring.
Not Using a Kitchen Scale: For precision in baking, using a kitchen scale to measure Flour by weight is highly recommended. This eliminates the variability caused by differences in packing and density.
Not Adjusting for Different Flour Types: Different types of Flour have different densities. Adjust your measurements based on the specific type of Flour you’re using.
Not Leveling Off the Flour Properly: When using the spoon and level method, level off the excess Flour with a flat edge. Only some measurements can result from adequate leveling.
Not Measuring Consistently: For consistent results, always measure Flour the same way each time you cook or bake. Developing a consistent technique helps ensure reliable outcomes.
By being mindful of these common mistakes and following accurate measuring techniques, you’ll improve your cooking and baking results and create delicious dishes with consistent texture and flavor.
Conclusion and final thoughts on converting grams to cups
Converting grams to cups is a common task in cooking and baking, but it’s important to approach it with an understanding of its complexities. The conversion ratio between grams and cups can vary due to ingredient density, packing methods, and humidity. Here’s a summary of key points and final thoughts on converting grams to cups:
Precision Matters: In baking, where precise ratios are crucial, measuring by weight using grams is the most accurate method. Kitchen scales offer the highest level of consistency and reliability.
Measurement Techniques: When using cups, techniques like the spoon and level method help avoid overpacking the ingredient, resulting in a more accurate measurement.
Flour Variability: Flour, in particular, is variable due to different types and how it’s packed. As such, conversion ratios can differ widely for different flour types.
Fluffing and Aeration: Fluffing and aerating the ingredient can prevent compaction and ensure that the measured amount matches the intended weight more closely.
Humidity Considerations: Humidity can affect ingredient density, so measuring ingredients consistently can help maintain accuracy.
Adjust for Specific Ingredients: Different ingredients have different densities. Conversion ratios vary significantly between Flour, sugar, nuts, and liquids.
Consistency is Key: Using a consistent method each time you measure an ingredient will lead to more predictable results in your cooking and baking.
Kitchen Scale Advantage: Invest in a kitchen scale if precision is paramount. It’s a versatile tool for both experienced cooks and beginners.
Recipes and Adaptations: Follow the measurement methods specified in recipes, especially when trying a new dish. As you gain experience, you can adapt measurements to your preferences and techniques.
Practice and Learning: You’ll develop a better feel for conversions based on your frequently used ingredients over time.
Remember that cooking is a blend of art and science. While accurate measurements are essential for baking, cooking can often tolerate more flexibility. If you need more certainty about conversions, it’s always best to err on caution and use a kitchen scale when precision is critical. As you continue to experiment in the kitchen, your understanding of conversions will naturally improve, contributing to your culinary expertise.